Set-ExchAVExclusions
https://microsoft.github.io/CSS-Exchange/Setup/Set-ExchAVExclusions/
https://www.alitajran.com/check-exchange-antivirus-exclusions/
Check Exchange Antivirus exclusions
How to test that the Exchange Server exclusions are correctly excluded from the Antivirus? We already showed how to run a PowerShell script and get the Antivirus exclusions for Exchange Server 2013/2016/2019. The script runs on the Exchange Servers, and all the exclusions for Exchange Server will show up as a result in three text files. After that, you need to exclude it from the security product. This can be Microsoft Defender Antivirus or any third-party security product running on the Exchange Server.
What if you want to double-check that the Antivirus exclusions are set correctly? In this article, we will look at how to check the Exchange Antivirus exclusions with a PowerShell script.
Introduction
Most of the time that you set the Antivirus exclusions for Exchange Server, you don’t look back. But isn’t it better to double-check and verify that the exclusions are set correctly? Perhaps you don’t administer the security product and send the exclusions to the security team. How can you confirm that the team did exclude the correct exclusions?
Let’s look at the PowerShell script and check if the Antivirus exclusions on the Exchange Server are correctly set.
Test Exchange Antivirus exclusions PowerShell script
An excellent way to check if the Antivirus exclusions are configured correctly is with the Test-ExchAVExclusions.ps1 PowerShell script.
The Test-ExchAVExclusions.ps1 PowerShell script writes an EICAR test file to all paths that need to be excluded on the Exchange Server. Then, they should not be picked up by the security product. This can be the Microsoft Defender Antivirus or a third-party Antivirus product running on the Exchange Server.
There are two results after running the script:
- If the file is removed, then the path is not properly excluded from AV Scanning
- If the file is not removed, then it should be properly excluded
Once the script creates the EICAR files, it will wait 60 seconds for AV to “see” and remove the file.
Note: The EICAR Antivirus Test File or EICAR test file is a computer file that was developed by the European Institute for Computer Antivirus Research (EICAR) and Computer Antivirus Research Organization (CARO), to test the response of computer antivirus (AV) programs. Instead of using real malware, which could cause real damage, this test file allows people to test antivirus software without using an actual computer virus.
Download Test Exchange Antivirus exclusions PowerShell script
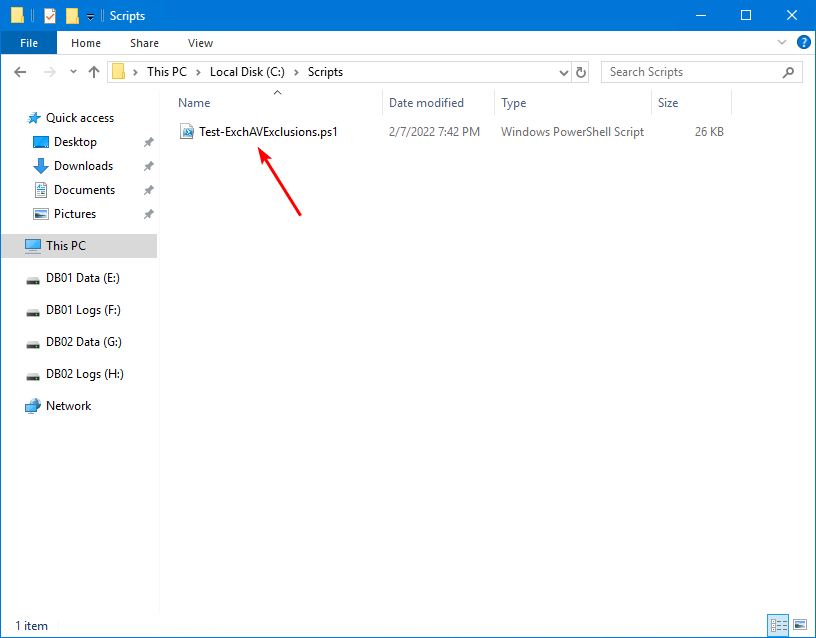
Download Test-ExchAVExclusions.ps1 PowerShell script from GitHub and place it on the Exchange Server C:\scripts folder. If you don’t have a scripts folder, create one.
Ensure that the file is unblocked to prevent errors when running the script. Read more in the article Not digitally signed error when running PowerShell script.
Run Test Exchange Antivirus exclusions PowerShell script without exclusions set
Run Exchange Management Shell as administrator. Change the directory path to C:\scripts and run the script.
The script will run for 60 seconds.

After the script is done running, it will show the results on the screen.
Analyze Exchange Antivirus exclusion log files
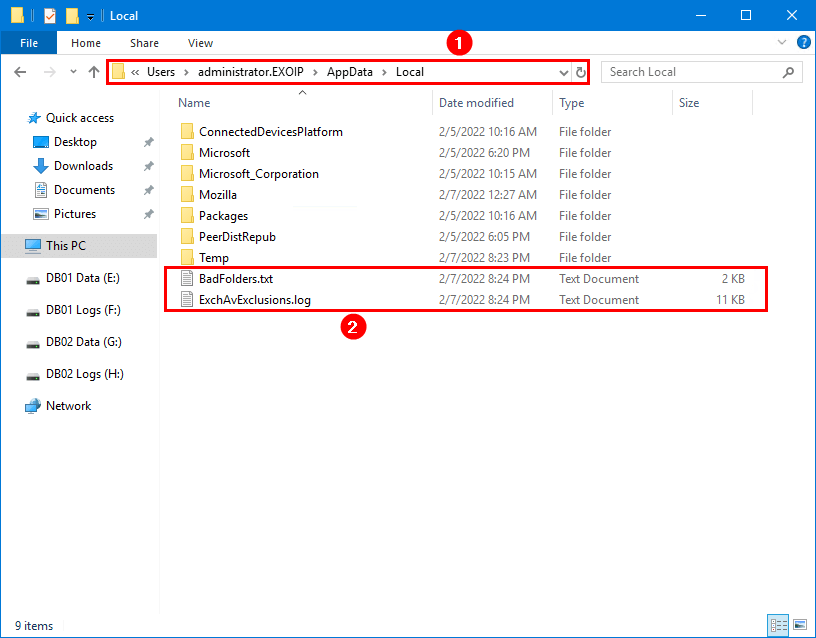
The PowerShell script outputs two files in the AppData local path:
- BadFolders.txt: List of folders scanned by Antivirus
- ExchAvExclusions.log: Log file
Start File Explorer and go to the path:
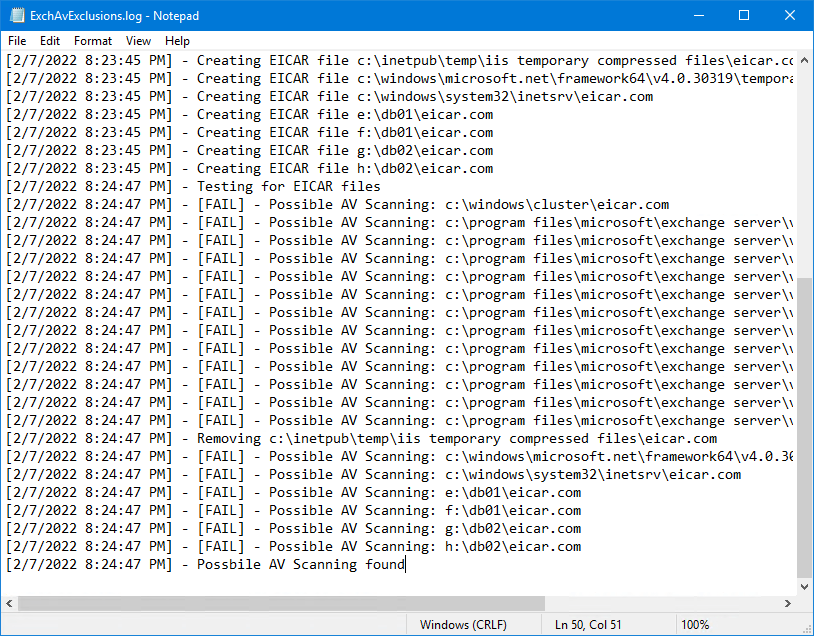
Open and analyze the ExchAvExclusions.log file.
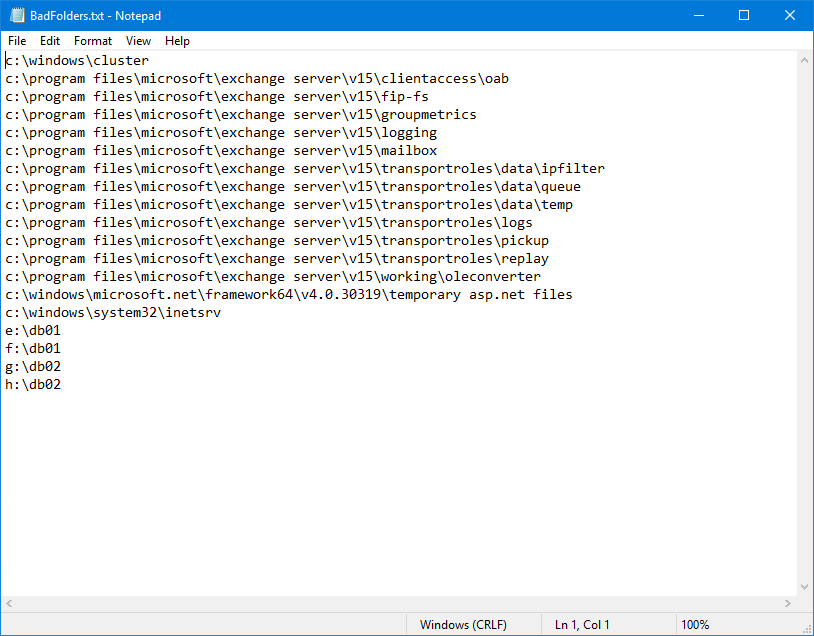
Open and analyze the BadFolders.txt file.
Run Test Exchange Antivirus exclusions PowerShell script with exclusions set
Let’s rerun the Test-ExchAVExclusions.ps1 PowerShell script. But, this time with the Exchange Server Antivirus exclusions set.
After scanning, it did show that Antivirus exclusions are set on the Exchange Server.
Everything looks great!
Read more: Turn off Windows Defender in Windows 11 permanently »
Conclusion
You learned how to check the Exchange Server Antivirus exclusions. It’s good to double-check that the Antivirus exclusions are set on the Exchange Server. This can be Microsoft Defender Antivirus or a third-party antivirus product. You might find an exclusion that isn’t set correctly. Ensure that the Exchange Antivirus exclusions are set and rerun the script to test again.
Did you enjoy this article? You may also like Outlook issues due to Exchange Server AMSI integration. Don’t forget to follow us and share this article.


Комментарии
Отправить комментарий